
 Water holds a special significance to people; it makes up 70% of the Earth’s surface, and about the same of our own bodies. It’s the only thing we absolutely cannot live without.
Because of this, images of water can stir very profound reactions inside of people – excitement, serenity, longing, awe, and even fear of its immense power. After all, it can literally move mountains. Sure, it may take thousands of years, but water is infinitely patient.

Please click the images to view larger versions.
When we pick up our cameras and snap a shot of the ocean, a waterfall, or even a drop of water in a glass, all these ideas are being absorbed into the image, yet every composition will invoke different associations in the viewer’s mind. What you decide to shoot, and how you decide to shoot it, will greatly affect the impact of the image.
When photographing water, there are a few pieces of equipment you might want to have handy:
- A tripod. Shots of water often require long shutter speeds. A tripod will help you compose your shot, as well as enable you to achieve silky and/or misty water effects.
- A wide-angle lens, for panoramic shots.
- A telephoto lens, for detail shots.
- A polarizing filter (one for each lens, unless they are the same diameter). This will reduce glare from reflecting off the surface of the water, improving the look of reflections and even out your exposure.
- A neutral density filter. In bright conditions, this will allow you to achieve longer shutter speeds and/or wider apertures than you would otherwise be able to use.
- A graduated ND filter. This has a gradient density from top to bottom, so you can darken only one half of the image such as the sky.
1. Capturing Reflections in Calm Water
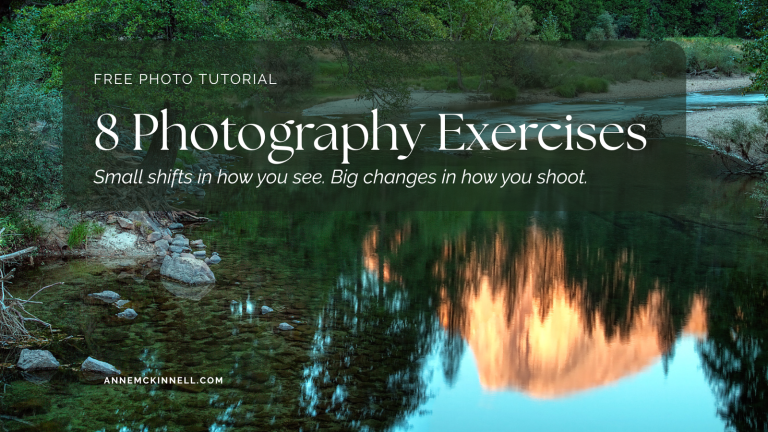
When the air is calm over inland bodies of water (lakes, ponds, puddles), they can reflect the surroundings off their glassy surface, creating beautiful patterns and repetition that keep the viewer absorbed in the image.

Capturing this in a photograph can be tricky, though. To maximize the power of your photo, give some thought to a few things before hitting the shutter.
- Timing
Water is generally calmest in the early morning hours, before the sun’s heat throws the winds into motion. Getting up early will help you capture the most pristine surface. Of course, the morning of a storm will still be more active than the afternoon of a calm day, so watch the weather reports to determine the best time to shoot. - Location
A lake that is shielded from the breeze by surrounding mountains is going to be smoother than one in the middle of a large, open field. Even within the context of any given lake, different parts of it will be more placid than others. If you’re experiencing rippling waters, seek out an area that is sheltered by trees to cut the winds. - Exposure
An image that’s on the brighter side will feel gentle and peaceful, while a darker image may start to take on a stillness that borders on eerie. This has to do with the time of day, but also with the ratio of open light to shadow, and the exposure you use. Reflections off of water tend to be darker than the scene they’re echoing, so using a graduated filter to deepen the sky will create even tones between the two halves of the image. If there is any movement on the water’s surface, a longer shutter speed will help smooth it out.
2. Making Moving Water Silky Smooth
Water doesn’t have to be still to be smooth, though. Use long exposures when photographing rivers, waterfalls, and even man-made fountains to make the rushing water appear soft and fluid, even creamy.

The faster the water is flowing, the shorter the shutter speed needs to be to blur it. Slow-moving creeks, on the other hand, may need a full second exposure to achieve this effect. If you’re shooting in broad daylight, you may need a neutral density filter to allow the aperture/shutter speed combination you want without overexposing the picture.

Whenever you use a long shutter speed, be aware of the movement of other objects in the frame such as trees, boats, and people, as their movement will be blurred as well. Balance your shutter speed with every element in mind to achieve the perfect level of harmony between the water and its surroundings.
3. Creating a Mist on the Water’s Surface
If you use the same technique on ocean shores instead of waterfalls, the spray from the surf creates mist that hovers over the water. This is most pronounced when the tide is coming in, or when the sea is rough due to a nearby storm, so keep your eyes on the weather. You’ll see the effect much more on craggy shores, where the waves crash against the rocks or cliff faces and spray in all directions. Shooting these scenes with a long exposure forms a hazy, somewhat ethereal seascape.

In some conditions, the cool sea breeze colliding with the warmer inland air creates fog – sometimes a thin wisp that covers the water’s surface.

4. Freezing the Action
A fun alternative to all of these techniques is their very opposite. When water is in motion, such as on a river or rocky seashore, use a fast shutter speed to freeze the action. This can create a very lively, dramatic composition that suspends the water’s movement in time, capturing its shapes and forms that usually pass so quickly.

A fairly fast shutter speed is necessary to stop a splash in its tracks, so brighter conditions are better for this type of photography. Use a wide aperture to allow these short exposures and to focus the viewer’s attention on the water’s detail. This is especially necessary because a polarizing filter should still be used to cut the water’s glare, which will decrease your light by roughly two stops.

Whatever type of shot you’re taking, when you’re near the water with expensive photo equipment, it’s always a good idea to keep your camera and other electronics tethered to the shore to prevent any unhappy accidents! Consider your rules of composition when framing your shot, using the water as an element to draw your viewer into the photograph and keep them there.
If you enjoyed this post, don’t forget to “pin it!”


Your tutorials and your ebooks are an inspiration. Have been shooting for 10 years, but never so elaborate. Wish I could travel a bit more to these places. I know, “Just Do It”.
Thank you so much for your wonderful inspiration to go out and take photos in places that you love. Wishing you the best news so you can go afar with your camera
Just mind blowing dear!! i m a Beginner. Right now in photography u r god to me. wish u luck!
Anne, you have shared some excellent insights.
Thank you
Hi Anne,
j like so much your photos.
J love nature photography and yours pictures invite me to go for take pictures.
So j think that is very beatiful about your attitude to present yours immages and way of life at Others persons.
It’s a very good example for me.
Thanks
Alessandro
Thank you so much Alessandro, I really appreciate that.
Thanks
A Big Liiiiiiiiiiiiiiiiiiiiiiiiike
Your tutorials are always full of useful tips, but most of all full of inspiration. It’s good to see you posting again and I hope everything works out OK for you on the health front.
Jen
Thanks for a beautiful and educational tutorial. Love your photos!
Thank you very much John!
Hi Anne, First time visiting your blog and sad to see your post regarding your health issues. As someone whose life has been turned upside down by health issues over the past four years, I can only tell you that life continues no matter what. Whether your news is good or not, you will cope and carry on, I promise. I will read further to see what happens but know that a total stranger sends you a hug and a prayer tonight.
Kim
Hi Kim, thank you very much. It’s the waiting that is the hard part. Thanks for your visit and I hope you enjoy the blog.
This is a very inspiring and thoroughly educational post and you have very thoughtfully detailed wonderful suggestions that will no count benefit many novice photographers! Your philosophical insights into our relationship with water are very beautiful as well!
Thank you so much Mary! I do love water, especially the ocean, and I cherish my relationship with it, so I’m glad that came through in the post.
Pingback: Grab a Coffee & Settle In – 33 Great Photography Links
Glad to see your move has improved, a positive attitude is the best! Thanks for a great tutorial and stay upbeat!
Hi Joan, I am trying to be positive, but it’s not something that comes naturally to me. Thank you very much for your comments 🙂
Anne,
Your article offers the reader a trifecta of beauty, inspiration and education.
Please consider reading “The Healing Code” by authors
Alexander Loyd & Ben Johnson.
Prayers and best wishes surround you!
Abbey
Hi Abbey, thank you very much – I love the trifecta part 🙂 I will check out the book you have mentioned – I could use some healing. Thanks for your comments.
Great article here, Anne, you’ve covered all the key points to my mind. I just LOVE your photography, it’s not just a great way to illustrate what you’re talking about here, it’s also a pure joy to view and take in. Best wishes, my dear friend, we anxiously await good news for you.
Thank you so much for your very kind comments Toad! I really appreciate it.
Fantastic tips, now I just need a real camera beyond the one in my htc one, haha.
Hey Devlin, yes, a real camera does help although its amazing what people can do with their camera phones these days. I haven’t used mine much. Thanks for your comments!
Great post Anne with wonderful images to illustrate. Hoping you get that positive news soon so you can get back on the road!
All the best, Russ
Thank you so much Russ, I hope to be on the road soon too!
Thank you Anne. As always you are such a special lady. So generous with your time and talent. Wishing you nothing but good news. Love the photos!
Much appreciated Cynthia!
thank you so much for this great tutorial Anne. The photos are so beautiful and the water comes alive for me.
Thinking of you with positive vibes :).
Many thanks Shirley.
You are an inspiration to me, hang in there!!
Thanks Michelle, I means a lot to me!
Beautiful post Anne and love the pictures.
Wish you are keeping well and stay positive. Wishing the wait will be over soon with a good news 🙂
Thank you very much Anupama!
Inspiration photography and great insight!
Irina Nekrasova,
Scotts Valley,Ca